ReactJS Dropdown Example
In this article we will build a Dropdown ReactJS Component. The popularity of ReactJS has grown in leaps and bounds. And it has become the go to library for front end development. We take a look at creating a ReactJS Dropdown Component and learn some nuances of ReactJS. The skills learnt in this example can be applied to develop other reusable ReactJS Components for your applications.
So without further ado let us get started with this example. Firstly let me list the tools and technologies used in this example.
1. Tools and Technologies
I have used the below set of tools and technologies. Some of them are madatory whilst others are optional and can be replaced with your favorites.
The create-react-app package is a tool from the folks at Facebook. It helps us to quickly scaffold a ReactJS Application. Also, it uses the latest version of ReactJS. Visual Studio Code is my favorite IDE for JavaScript development but you are free to follow along in your favorite one.
2. Application Structure
To generate our application structure we need to run the below command.
>npx create-react-app my-app
The npx command pulls down a temporary copy of create-react-app and runs it with the provided arguments. This prevents pollution of the global namespace with less frequently used tools.
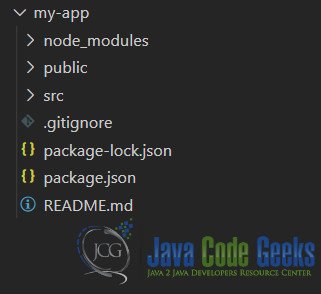
After the above command completes our ReactJS application created in the my-app folder should have the following layout.

In the next section we begin to build our Dropdown component.
3. Dropdown Component
To create our dropdown component we create a file named Dropdown.js under a folder called Component within the src folder. This component will render a select tag along with passed in options as props.
The code for our Dropdown component looks like below:Dropdown.js
import React from "react";

function Dropdown(props) {
    return <>
        <select {...props}>
            {props.options &&
                props.options.map(o =>
                    <option key={o.key} value={o.key}>
{o.text}</option>)
            }
        </select>
    </>;
}
export default Dropdown;
Now let us modify the index.js file to use and display our Dropdown component. The code for index.js should look like below:index.js
import React from 'react';
import ReactDOM from 'react-dom';
import './index.css';
import Dropdown from './Components/Dropdown';
import * as serviceWorker from './serviceWorker';

const container = {
  display: 'flex',
  flexDirection: 'column',
  width: '100vw',
  height: '100vh',
  justifyContent: 'center',
  alignItems: 'center'
}
const options = [
  { key: 'key-1', text: 'Option 1' },
  { key: 'key-2', text: 'Option 2' },
  { key: 'key-3', text: 'Option 3' },
  { key: 'key-4', text: 'Option 4' },
  { key: 'key-5', text: 'Option 5' }
]
ReactDOM.render(
  <React.StrictMode>
    <div style={container}>
      <Dropdown options={options} multiple />
      <Dropdown options={options} />
    </div>
  </React.StrictMode>,
  document.getElementById('root')
);

// If you want your app to work offline and load faster, you can change
// unregister() to register() below. Note this comes with some pitfalls.
// Learn more about service workers: https://bit.ly/CRA-PWA
serviceWorker.unregister();
These are all the coding changes that we need to make. Now to see our component in action we run the application in the next section.
4. Dropdown Component in Action
To run the application we need to execute the below command:
/my-app>npm start
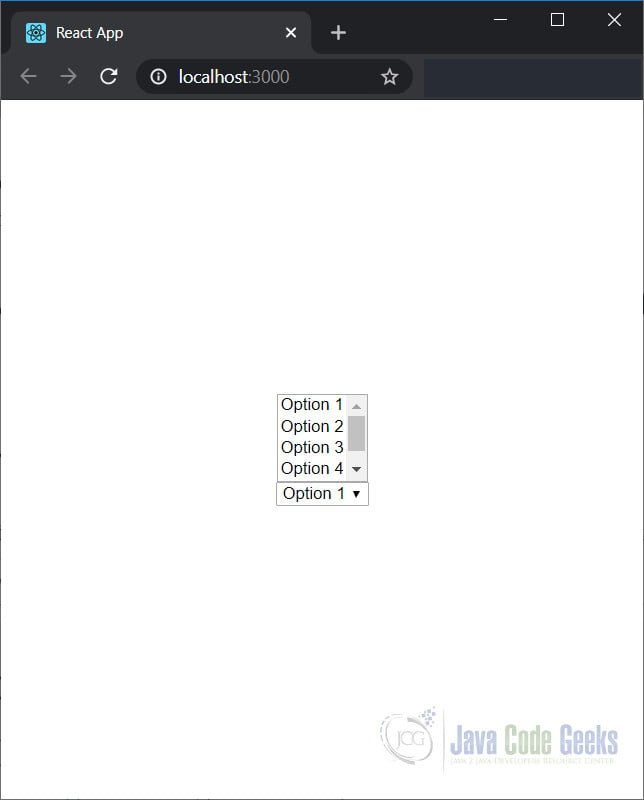
This will start and launch the application in the default browser. And the output should look like below:

This wraps up our look at ReactJS Dropdown Example. To get the source code for this example the details are in the next section
5. Download the Source Code
You can download the full source code of this example here: ReactJS Dropdown Example


